Give thanks for jeans!

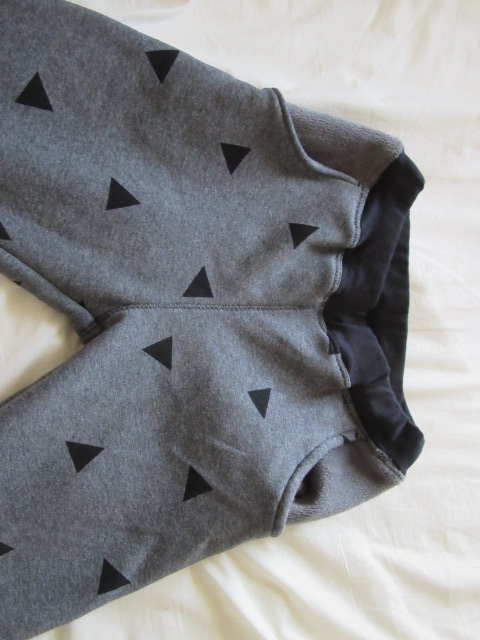
I am in need of new jeans. Desperate need. The last pair I made are starting to wear through all across the top of the thigh at the back. Sniff. Unfortunately the pair I started after that have achieved the dreaded WIP status, mainly due to the metallic denim I chose being a pig to work with, and I’m struggling to find the sewjo to get back to them.

But never fear, I have hatched a plan with my online sewing buddy Amy to sew jeans together, group motivation and all that. We’re planning to share lots of moral support, fitting trials and tribulations, tips and all that over on the Sew Alongs and Sewing Contests facebook group with an informal sew a long from Oct 14th – Nov 24th (which is when they celebrate Thanksgiving in the USA, seemed like as good a time as any to try and finish jeans for).  This is quite an ad hoc, informal sew along, so unlike some of the sew alongs there, the only prize on offer is a finished pair of jeans, but if that sounds like motivation enough you’re welcome to join us!

We’ve given ourselves nearly 3 weeks to work up to the idea, so if you musing about joining in, here are some ideas for patterns that have been suggested by group members already…

Liana Stretch Jeans Save the DayFirst up, the Liana jeans from Itch to Stitch, which have a previously featured as a sew  along on the face book page you can still see all the blog posts that Kennis wrote.  I didn’t join in first time around, but I was so impressed by the great jeans I saw made then that I have since made my own pair.  This pattern recommends 25% stretch denim, which I’ve been struggling to buy. I did find some, but clearly the quality wasn’t that great as it’s wearing through, so I’m contemplating using a different pattern this time. But rest assured, as soon as I get a decent source of stretchy enough denim I’m making this pattern again.

Morgan Boyfriend Jeans pattern // by Closet Case Files

One pattern I’m considering is the Morgan jeans, from closet case files as they’re designed for non stretchy denim (and I have some really nice denim I bought online which turned out to not be as stretchy as I thought from the description).

Ginger Jeans pattern // Skinny jeans sewing pattern

Of course, we also need to mention Morgan’s older, skinnier, stretchier sister  Ginger for which there is also a series of handy  sew a long posts written up.

Simplicity 8222 Sewing Pattern

Then again, I’ve been recommended the Mimi G Simpicity jeans pattern which  has slim/average/curvy fit options provided in the pattern and a you tube sew a long, as long as I can find that elusive 25% stretch denim.

Jamie Jeans

Fancy something a little different, how about the Named Jamie Jeans with their vertical seam up the trouser front and the cute pockets.  Indiesew have sew a long posts on their blog to help you out too.

Or how about the Cake Endevour Trousers made up in denim, like here?

Thurlow Trousers and Shorts sewing pattern by Sewaholic Patterns ...

After all, jeans are just trousers made from denim. So I maybe I could finally use the Sewaholic Thurlow trouser pattern I bought a while ago.

DSCF7808

After all, I made these Juniper’s from Colette in a mad stripey denim from ikea (still going srong but looking a little shabby from where the cat stropped them).

Or maybe I could make another iteration of Ottobre pattern, shown here in their foxy iteration.

Bootstrapfashion.com - Designer Sewing Patterns, Free Trend Reports ...

Then again, I could get a copy of the Vado jeans patern custom made to my measurements at Boot strap fashion and follow Kelly’s sew a long posts.

Decisions decisions. It’s going to be hard to pick a pattern. Which is a shame as the sooner I start the process the more organised I’m likely to be and if I get really organised I might try and hack a pair to be more suitable for cycling like Melissa at fehrtrade has done here.

So, to recap, you can join in if you’ve always wanted to make jeans but were too scared, have made them 30 times before, or anywhere in between. You can make them from scratch or finish a WIP. You can use a brand new pattern you’ve never tried before or an old favourite.Use a”proper” jeans pattern, or a normal trouser/pants pattern, or even something you’ve drated yourself. You can use stretch denim, or non stretch denim, or even not denim at all. We aim to start on 14 Oct but eager beavers are welcome to get going before then and we will always tolerate stragglers. Fitting advice, design dilema’s and general encouragement on the facebook group (I’m no expert, I have made about 5 pairs of jeans before, but I generally find there’s someone there who will know the answer to your questions), however you don’t need to be a member to take part.  Hopefully we will all have new jeans to wear at Thanksgiving (even if you, like me, don’t live in the states and will be the only person on your street to realise it even is Thanksgiving). Or the day after thanksgiving, if you like to look a little smarter on the day itself.

So, happy jeans planning. And if your favourite pattern isn’t on the list do let me know in the comments.

PS

Most of the photo’s in this post are the official pattern photo’s, which I’m assuming designers will be happy for me to share as it’s basically free advertising for them (if not, and they’re yours, let me know and I’ll take them down). The rest of the photo’s are my own. It should be fairly obvious which is which.

A decade of parenting

Eek, that’s a scary th0ught. Kind of implies that the probationary period is over and I should have figured out what I’m doing by now.IMG_0086[1].JPG

We managed a party without incident at the weekend and we seemed to have survived the day itself today, despite the kids excitement induced lack of decent sleep last night.

The trousers seem to go down well. He tried them on for me to take photo’s cos he knows me well, however he was so excited he couldn’t keep still! First up, the soft shell trousers, which he did an impromptu “shower dance” in (as they’re shower proof).

img_01151

The grey ones are the softest on the inside and he enjoyed rubbing his legs whilst wearing them, which means he was still enough for you to be able to tell that they are a wearable fit with definite growing room.

The first pair I made were the ones he chose to wear to go out for a meal tonight (and yes, they are in that first shot, he started off doing a lot of high kicking in them).

So what with the long sleeved t shirt, I’m now half way through finishing the 8 items challenge for SSW2. However, I think I’m going to take a pause from sewing Boy things now and sew something For Myself. (I might even be good and tackle something from my UFO pile…)

Background Noise

Normally this is a sewing blog.  Occasionally I write about knitting or cooking or my cack handed attempts at woodwork instead, cos it’s my blog and I get to choose what I write about (it’s never crochet though, I don’t do crochet).  Just like you get to choose if you read it or not.

Today I choose to write about the phone call we just got, because I want to tell a lot of people without explaining the same things over and over again and it’s a bit long to fit in a facebook status.

The phone call was about my son, known here as The Boy (we’re all feeling our own ways towards how to parent in the shiny new age of everything being on the internet, not mentioning my kids names so they can’t be found by search engines is my current approach). The Boy will coincidentally, turn 10 years old tomorrow, double figures, a decade of parenting for us and all that malarky.

So, a nice man from the Autistic Spectrum Condition/Disorder Team (not sure which term they use, I prefer the former and will use ASC from hereon in) just rang to let us know that they have decided to give him an ASC diagnosis. And my immediate reaction was “Phew”. So here are some answers to a few questions I’m anticipating on encountering.

What is an Autistic Spectrum Condition?

In case you have been sitting under a rock recently, “Autism is a lifelong, developmental disability that affects how a person communicates with and relates to other people, and how they experience the world around them” (that’s from the National Autistic Society website and there’s loads more information there). Autistic people are often referred to as having a triad of impairments of difficulties with Social Communication, Social Interaction and Social Imagination.

Why not Asperger’s?

Because the rule book, otherwise known as DSM-V, has been redefined, so that there is technically no longer a diagnosis of Asperger’s Syndrome to give.  Obviously that doesn’t mean that all those people who were diagnosed with Asperger’s Syndrome now don’t have it any more, just that they have now come under the umbrella term of Autistic Spectrum Condition. If you want to know more about this then here is probably a good place to start.

The ASC team say that the term Asperger’s is “more or less applicable” to people that they diagnose as being on the spectrum (as they only meet people age 5 and over, and anyone with a more severe form of autism is likely to be picked up before then).  So if it helps you to think of him as having Asperger’s Syndrome, that’s probably a good place to start.

You poor thing

Err, no. See, The Boy is The Boy is The Boy and always will be despite what anyone says. He is no different today than he was yesterday. He is amazing and funny and infuriating and clever and loud and lovely and, well, not exactly average. He’s never been average. His brain is wired up a little differently. That’s been clear for a while, we just have a handle now on what sort of differently it’s wired. For somethings the way his brain works is a distinct advantage, and for other things it makes life trickier, but at the end of the day how his brain works is him and I wouldn’t want to change his brain because then he wouldn’t be him any more. So, no sympathy please, we (my husband, often referred to here as Long Suffering Husband or LSH and I) are happy about this diagnosis.

So why do you want a diagnosis then?

Good question, as I just said a diagnosis doesn’t change who he is. And there is no treatment for ASC, but then we don’t want a cure. What we want is understanding.

We, as parents, want to understand him better so that we can help him cope with the things he finds tricky and develop strategies that help him find them easier. And understanding him better also helps us not get so frustrated at times (and we do get frustrated at times).

And we want The  World to understand him better, which at the moment mainly means school. His current school is pretty good actually and have put things in place to help him already, but we’re hoping a piece of paper with a diagnosis on it will help us get our concerns heard and addressed when we negotiate the whole choosing and starting a secondary school thingy (as opposed to being dismissed as neurotic parents).

And also, we want him to understand himself. The Boy very much likes to know how things work, and he is aware that he is not average, so we hope that understanding why he finds some things tricky will help him, we know that other people on the spectrum have found it helpful.

Why did you want to label him?

We don’t see it as a label, we see it as a signpost, a way to help others understand him. We aren’t going to be making him t shirts and badges announcing this to the world, we’ll tell people when we think it’s appropriate, when it’ll help. And when he’s older, he can choose if he wants to tell people or not.

But I’ve met The Boy and he didn’t seem Autistic to me…

Did he make eye contact with you? Some people on the spectrum find that very hard, some are the opposite and keep making eye contact even when it’s not appropriate. The Boy makes eye contact sometimes and at other times finds it hard to look at our faces. Eye contact on isn’t enough to diagnose someone with ASC.

Did he speak to you? Lots? Not all people on the spectrum find it hard to talk to others. If you’re reading this, you’re probably adult, so ask yourself, is it usual for someone of his age to speak to you quite as much as he did? On the topics that he did?

It is true that there is no blood test for being on the spectrum and it is to some extent a subjective opinion about whether someone meets the criteria or not. But this diagnosis was made by a team of ASC experts, at the request of our GP, and they have considered information from us as parents, from his teachers, from a paedatrician, from an educational psycologist and from a communication and interaction specialist, as well as meeting with both us and  him. They have sifted the evidence, considered it as a group and feel they are “confident in this diagnosis” and have “no major reservations”.

So, you’re opinion isn’t going to change his diagnosis, but maybe his diagnosis could change your opinion of what it means for someone to be on the spectrum?

He’s very bright…

People often say this in relation to The Boy whenever the possibility of him being on the spectrum is discussed. Very lovely people who I’m sure mean well, however I’m never quite sure what their point is. Obviously, they mean he’s very bright, which I know. It’s often fairly obvious that he’s quite bright within 5 minutes of meeting him and, well, I’m his mum, so  yes, I’m aware that he’s bright. Being bright doesn’t stop you being on the Autistic Specturm. Being bright doesn’t place you on the Autistic Spectrum. The two things are completely independent of each other. I sometimes think it’s meant as a sort of consolation prize, like, oh, so he may be on the Autistic Sepectrum but at least he’s bright. The thing is, the two things are so intrinsically part of him, that one isn’t a consolation to the other, they are just who he is. So, if you say this, I shan’t be offended, but don’t expect a reaction much more than “mmmm”, unless you can elucidate a little.

I want to find out more…

Read A Beginners Guide to Autism Spectrum Disorders by Paul G Taylor. It’s excellent, it’s short, it’s a quick read and it really helps you get your head around how people on the spectrum think.  Or hear him talk briefly about what his book’s about here.

What next?

Same old same old really. Including the not so inspiring waiting around indeterminately for Virgin Care and the like whilst they do whatever it is they do whilst you’re on a waiting list (lose files?). Next up (hopefully) a look at his sensory issues (which is baffingly not included in an ASC assessment but is dealt with by a separate team) and we were also recommended today to consider having him assessed for ADHD (apparently a quicker process around here than the ASC assessment at least).

Apart from that, we will continue to look after both our kids as best we can, hoping that the number of times we get things right far outweighs those occasions that we get things wrong. And I will continue to make him weird and wonderful colourful “comfy”trousers because they help him cope a bit better. Like I said, same old same old, it’s just now we’ll have a piece of paper to help us along the way.


Soft Cell

Until recently, if someone said “Soft Cell” to me I would mentally start singing Tainted Love.  ( A few weeks ago I found out (to my shame), that theirs wasn’t the orignal version of this song, rather that was Gloria Jones back in 1964).

IMG_0093[1].JPG

Now I will also think of Soft Shell (technically it’s name but it will forever be Soft Cell to me), a water-repellent fabric with a cosy fleece reverse that “protects against wind, cold and moisture, making it ideal for sports jackets and other clothing”. I’d never heard of it, but I fell in love with these dogs from myfabric thinking that they were fleece backed sweatshirt fabric and was heartbroken when they ran out of stock whilst I dithered. So when they came back in stock, I bought some, even though by then I realised it wasn’t sweatshirt fabric. I figured I could make it work, I mean, check out those sunglasses on that collie!

IMG_0092[1].JPG

It feels slightly rubbery to the touch, has that slight swishy sound when the right sides rub together that you get with waterproof trousers and hasn’t really any stretch. The fleece back is fairly thin so the fabric is quite flexible and I think it would be perfect for an autumn/spring jacket (or maybe a dog coat, that would be cute). I wouldn’t say it was the easiest fabric to handle, but it wasn’t a pain either (it helped that I had just made this pattern up, so I had it all down). It doesn’t fray, I did manage to pin it (with long glass headed pins) and they didn’t seem to leave holes, and I sewed it ok with a stretch needle in my machine.  I didn’t dare iron this 100% polyester fabric though, on either side, instead topstitching my seam allowances flat (particularly proud of that on the inseam, serious fabric manipulation was needed to get that through the machine).

IMG_0091[1].JPG

Of course, I didn’t make a jacket with it. I made yet more trousers for the Boy, cos it’s getting colder around here, he’s been growing a ton, and his birthday is imminent. With turquoise ribbing to match the reverse and the fleece side inside the pockets for added snugglyness like last time. I’m slightly worried about how this fabric stand up to wear and tear, but there’s only one way to find out….

Mash Up

Extra frost protection for the runner bean, cos I do like to wash his clothes sometimes. Another one for his upcoming birthday, so no model shots this time.

img_00441

Grey with black triangles,  a bit subtle for him maybe? I’m hoping that the super soft plush fleece reverse will win him over and help him wear this more neutral garment. (Also, do you have any idea how hard it is to get non floral, non star prints on sweatshirt fabric?).

img_00461

These are a mash up of the Domi sweatpant pattern and the Ottobre (mock denim) ones I made him previously. I started by overlapping the front and back pieces of the Domi by 2cm at the side seam (to allow for each piece having a 1cm seam allowance) and tracing this new piece for a single piece Domi pattern (so no side seams to sew, but that does mean the Domi pockets as drafted won’t work, fear not though, I don’t want to use them!). I doubled the length of the Domi cuff (to make it more similar to the Ottobre pattern proportions), and shortened the bottom of the leg by the appropriate amount to keep the overall leg length the same. Then I laid my previously adjusted Ottobre pattern on top of my new pattern piece and traced the hole for the pocket, making sure to line it up with the now non existent side seam and adding an extra couple of cm depth at the top (where its straight). I used the Ottobre pocket piece (with an extra 2cm strip along the top) and the Domi waistband.

img_00181

With a little help from my online sewing friends it was a pretty straight forward sew up. First up, someone scanned in their Ottobre instructions since I seam to have misplaced put my magazine in a sensible place, and I couldn’t remember how to sew the pocket, so very kind and helped me postpone a big Sewing Room clean up a little longer.  Next up, I someone else suggested I used twill tape to stabilise the seam and stop it stretching out as I didn’t interfacing ironed onto plush fleece would work well and wasn’t sure how to proceed.  (I used some thin cheap yellow ribbon rather than twill tape in the end).

IMG_0027[1].JPG

The first pocket I made (on the left), had mystery hole/gapage at the bottom corner once sewn up, that I just fixed with some zag zagging (a bit messy but I don’t think anyone will ever notice). I think it might have been due to the diagonal clip you make from the corner down towards the “side seam”, after you’ve sewn the curved edge and before you sew the straight edge. This was neither interfaced nor stabilised by ribbon (as it has no seam). So on the second pocket, I put a small piece of interfacing on the right side of the fabric within the seam allowance where I was going to clip and that seemed to work better (no mystery holes). Unfortunately giddy on success I then topstitched at the wrong seam allowance. You can’t win em all.

img_00481

Comparison shot, so you can see how my mash up compare to the straight Domi’s (left) and last years graded up Ottobre.  The new pairs are back in the cupboard now waiting for the big day. Fingers crossed they meet with approval…

Kushion Karma

This Niephlet present is even later than the last one. Badder Aunty. Hopefully it’s smooth satin blackness, supportive comfiness and amusing keyboard positioning handles will make up for the wait.

img_00211

Having used this pattern to make these neck support pillows before, it should’ve been a quick easy make, but clearly to punish me for my lax auntyingness, the fabric/machine/thread conspired to slip, snarl and break. However I won in the end and I now have a box of wrapped presents that I just need to get my act together and post.  Soon, I’ll do it soon. Honest.

Bad Aunty

IMG_0012[1].JPG

After a busy summer,the kids are now back at school and I’m finally catching up on organising overdue birthday presents for all my Niephlings north of the border.

Exibit A is a Maria Denmark Kirsten Kimono t-shirt in awesome print, with extra length for my superhero niece who is so tall that she doesn’t need to jump over buildings, she can just walk over them (well, almost).

IMG_0014[1].JPG

Babygowns

There are a lot of weird things that parents-to-be get told are “essential” for life with their new one. Actually, very few things are essential for babies (something to wear to keep them warm enough, somewhere safe to sleep, such as a cardboard box, something to drink, and nappies, oh boy are nappies essential, whatever type you choose), however there are things that make your life easier. Of course, what those things will be depends upon you, on your parenting style and on your baby. For such small people, babies can have quite strong opinions about things.

Anyway, one of the things on our not-exactly-essential-but-really-made-life-a-little-easier list back in the day was an elasticated sleep gown. Sooo much easier for blurry eyed middle of the night nappy changes. No poppers to have to get lined up and snapped together, just pull it up, change that nappy, and pull it down again. Especially good if your new baby screams for the entire time whenever it is undressed. Or dressed. Or having it’s nappy changed. (Yes, I am thinking of a particular not-so-small-any-more person here).

So my go to new baby present of choice has since then been an elasticated sleep gown. Not so cute as some presents, but a helluva lot more practical in my humble opinion, and practical is what all sleep deprived new parents need. So when I found out that someone in my family was expecting, I went to buy one from my favourite suppliers, only to find that they had gone out of business. All I could find was a very lovely, extremely expensive, plain white organic cotton gown (seriously, I get that white is cute, and unisex, but boy does it stain, and you know, cute as they are, baby’s excel at making stains right from the getgo).

DSCF0971.JPG

So, what’s a woman to do. Well, you probably guessed it by now, I found myself an elasticated gown pattern for a newborn nonetheless, with growing room included, generously provided for free. Only one problem, it didn’t have the fold over scratch mitts included, and I seem to remember they can be useful too. (Certainly more useful than the little mitts you can buy which Just Fall Off. And break your washing machine. I had a washing repair engineer once tell me that in his experience the major cause of washing machine failure was baby socks. Hmm, maybe one of those mesh wash bags needs to get added to the list).

Luckily my friend tipped me off about this envelope cuff tutorial. It’s in German, but I’m forever about to practice my (pretty basic) German and never quite get around to it so I had a stab at it. Much head scratching, dictionary consulting (both my old one from school and online ones), and badgering of anyone I know who might understand obscure German sewing terminolgy via social media later, staring at the photo’s later I finally decided to give it a go, and whatdya know, it worked!

First off a slinky yellow number covered in black flowers. I’m slightly worried about the flowers, not for gender reasons as the baby is predicted to be female, but black isn’t traditionally featured heavily on baby clothes. Still, it’s nightwear. It made up pretty quickly, I sewed the front over the back at the shoulders (rather than visa versa) due to my kids running off with the laptop so I didn’t have any instructions to hand, but I figure it’ll still work the same. As there isn’t a label in the back to tell which is the right way around, I sewed a small flower button on the front. Really well. Just in case. (Although newborns aren’t really up to grabbing things yet).

DSCF0970.JPG

It made up really quickly and looked very cute, so I ran up another one in some of the leftovers from my leggings. This pattern doesn’t take a lot of fabric but you do need some quite long pieces, so I couldn’t use leftovers from The Girl’s dress (not without piecing them, and I couldn’t be bothered to fuss about with that).

So, if you want to make envelope cuffs / inbuilt scratch mitts yourself and you don’t speak enough German to easily read the tutorial above, here’s what I did…

First off, envelope cuffs are made in two pieces, unlike normal cuffs, which are usually one piece with one seam to make a continuous loop. So you need two pattern pieces, more on the size of them later once I’ve explained what you do with them, but for now, one will be longer than the other (so it can be folded over to make the envelope bit), see pic top left.

Then you cut your pattern pieces out with one of the short edges on the fold, one short piece and and one long for each cuff you want (so almost certainly 2 of each then).

Lie the pieces next to each other, right side of the fabric outermost (I’m using the grey reverse of my kitty fabric to be the outside of my cuffs here to avoid mutilated cats) and line them up so that the short side with the raw edges are level with each other, second pic.

Now fold the longer one over so that it’s now the same height as the shorter one (pic number 3). You need to be a bit careful doing this as the inermost part of the fabric might want to roll down as you fold it over, be firm with it!  Once you’re happy with your double folded piece, put the shorter one on top of it (lining up those raw edges on the short edge). You now have a sandwich that is 4 pieces of fabric thick at the bottom and a whopping 6 pieces thick at the top. Pin and carefully sew up your side seams, taking care to match those folds up at one end of the line, I found it best to start my seam there otherwise one inevitably rolled off the other as I was sewing and they ended up mismatched.

Then trim your seam allowance to about 2-3mm.  At this point your cuff is made, if inside out, you may want to turn in the right way out to check that you do indeed have an envelope cuff (pic 7) that folds over to make a scratch mitt (pic 8), but you will need to turn it wrong side out again in order to attach it to your  cuff.

When attaching it to the sleeve, I made sure my envelope bits were at the back of the garment, as that made more sense to me, but they would work either way.

DSCF0956.JPG

On the left, using the sample measurements from the tutorial and a 1cm seam allowance, came out a bit narrow and not enough to turn over (luckily it was only basted in on a normal straight stitch). On the right, the new improved version, with added length and smaller seam allowances.

So, the $100 question, what size should your pattern pieces be?  Well, that will obviously depend on the size of your sleeve, if you’re using jersey or ribbing and how thick your fabric is. The original tutorial suggested using the cuff pieces from your garment pattern as a guide and adding 1/2 – 1cm width to allow for the fact that it needs to be wide enough to cover the hand, not just the wrist  (presumably you’d need too add on extra seam allowance too as your standard cuff will almost certainly only have one seam). She also suggests making the longer piece 1 1/2 times the length of the smaller one. Well, I didn’t have a pattern piece to start with as the gown pattern I was using has no cuffs. So I tried using her sample measurements (for an outfit for a 56cm baby, which I reckon is about newborn size) of an 8 x 8cm and a 8 x 12cm pattern piece. I found that in the jersey, the width seemed ok if I used the 1/4″ seam allowance form the gown pattern (more mixed measurements here), but I seem to have too much unenveloped cuff and not enough to fold over, so in the end I used an 8 x 8 cm pattern piece and an 8 x 13cm pattern piece (so the actual pieces will be twice that long as it’s cut on the fold) and that worked for me. Top tip, if you’re not sure, make one up (it doesn’t take much fabric) but sew it on to your sleeve with a standard straight stitch at first in case you want to unpick it!

Phew, that was a bit of a mouthful and I’m now acutely aware of how hard to read this might be to a non native English speaker!  Cudos to all the sewers out their reading tutorials in foreign languages, you are amazing!

Attack Kitties

They may look cute, but these kitties are on constant look out for the Mean Reds, ready to pounce on them in an instant.

IMG_0005[1]

Now my only problem is to rustle up something suitable to wear my new leggings with.

(BTW the waistband, unseen here, is cunningly constructed to omit bulky elastic overlap, thanks to the top tip in this Thread Theory Tutorial).