Turning out a trapper

My son doesn’t like his new coat as it hasn’t got a hood. I, on the other hand, having picked this one up cheap to replace a really chuffing espensive one that he lost on a school trip, am not prepared to buy him a new coat. So a hat it is then. And I had just the idea, I have a bag of offcuts of really nice quality fleece that someone was giving away and he has a craft book that shows you how to make a simple fleece hat, so I would help him make his own, this kind of thing, and then he might take better care of it, win win.


Except, The Boy, of course, had different idea’s, wanting a trapper hat like his dad’s. So I found this pattern, printed it out at 95% (to allow for the fact that it wasn’t lined in fake fur – the fleece is double sided), and made it up, topstitching the seams flat as I didn’t want to iron it. And it worked, but it was too big and fell off his head when he ran.


So, a few adjustments. Poppers to hold the front flap up. Reused bag bits to hold the ear flaps up out the way when not in use (or under his chin when down) and elastic at the back to keep it on his head (2 rows, the first wasn’t enough).


And voila, a hat that he loves (I think) and his sister hates (I’m pretty sure). Lets see how long he manages to keep it for…

IMG_0013[1].JPG

Oh and whilst I was at it I turned this small piece of navy/purple fleece into a band to wear under my cycle helmet, I think I might have accidentally made a coif! Or maybe I’ve made the crosscloth that goes under a coif, I only heard of them when I helped a friend make some clothes for tudor reinactment.

Winter Warmer

I’ve had some lovely organic cotton teal sweatshirt fabric sitting in my stash waiting to become a Jasper Dress for absolutely yonks because of THE FEAR. You know, the fear of wasting the perfect fabric and ruining the perfect pattern. So you do nothing.

Well, not quite nothing. First up I made up a shorter, collared version in some fleece and felt a bit meh about it. Meh about the slightly cheap farbic, meh about  the colour, meh about the fit. I wear it sometimes, cos I  have a serious jumper shortage.

IMG_0119.JPG

Then, before  Christmas, I made an impulse dress length version when I  had to have something red to wear to a choir event and I had some lovely red fleece stashed. But I didn’t quite have enough, so I ended up buying some black minky for the collar, cuffs, and hemband.

IMG_0134

I sized up this time, cos the last one is a bit tight, and then I ended up taking LOADS off the seams in places, cos it was a sack. It’s better now, but I’m still meh about the fitting. Plus, I don’t learn, fleece doesn’t behave like sweatshirt fabric, so it doesn’t really help me face my FEAR and make the “real deal up”.

IMG_0135

I think I didn’t blog it at the time because I’d lost my camera, and I’ve sort of lost track of what I did now. I know I left the pockets off, cos they fell in a really unflattering place last time, and then I have missed the pockets Every Single Time I’ve worn it since (especially as at this long length it renders the pockets in whatever jeans/skirt I’m wearing it with inaccessible). I also have failed to get a decent photograph of it ever since making it – maybe it’s a Secret Vampire Top?  In this shot you can almost see the large black button I used as I just happened to have it ligging about in my stash.

IMG_0067

So, thoughts on my big red “Santa Suit” (yup, it got called that by someone in my choir). On the plus side it’s warm, comfy, really warm, really comfy and kind of smart looking (by my standards at least).  Whereas on the down side I’m still not sure about the red/black colour combo (it skates too close to the classy/tacky line to me) and the fabric is so thick it’s not the most flattering garment (hence the Santa Suit comment I guess).  Very useful during the recent snowy weather we’ve been having though.

Maybe one day, I will face my fear and make the teal version up. I think partly that’s why I’m blogging this one – to try and galvanize myself into action. Anyone got any top tips on tackling The Fabric/Pattern Fear?


Soft Cell

Until recently, if someone said “Soft Cell” to me I would mentally start singing Tainted Love.  ( A few weeks ago I found out (to my shame), that theirs wasn’t the orignal version of this song, rather that was Gloria Jones back in 1964).

IMG_0093[1].JPG

Now I will also think of Soft Shell (technically it’s name but it will forever be Soft Cell to me), a water-repellent fabric with a cosy fleece reverse that “protects against wind, cold and moisture, making it ideal for sports jackets and other clothing”. I’d never heard of it, but I fell in love with these dogs from myfabric thinking that they were fleece backed sweatshirt fabric and was heartbroken when they ran out of stock whilst I dithered. So when they came back in stock, I bought some, even though by then I realised it wasn’t sweatshirt fabric. I figured I could make it work, I mean, check out those sunglasses on that collie!

IMG_0092[1].JPG

It feels slightly rubbery to the touch, has that slight swishy sound when the right sides rub together that you get with waterproof trousers and hasn’t really any stretch. The fleece back is fairly thin so the fabric is quite flexible and I think it would be perfect for an autumn/spring jacket (or maybe a dog coat, that would be cute). I wouldn’t say it was the easiest fabric to handle, but it wasn’t a pain either (it helped that I had just made this pattern up, so I had it all down). It doesn’t fray, I did manage to pin it (with long glass headed pins) and they didn’t seem to leave holes, and I sewed it ok with a stretch needle in my machine.  I didn’t dare iron this 100% polyester fabric though, on either side, instead topstitching my seam allowances flat (particularly proud of that on the inseam, serious fabric manipulation was needed to get that through the machine).

IMG_0091[1].JPG

Of course, I didn’t make a jacket with it. I made yet more trousers for the Boy, cos it’s getting colder around here, he’s been growing a ton, and his birthday is imminent. With turquoise ribbing to match the reverse and the fleece side inside the pockets for added snugglyness like last time. I’m slightly worried about how this fabric stand up to wear and tear, but there’s only one way to find out….

Mash Up

Extra frost protection for the runner bean, cos I do like to wash his clothes sometimes. Another one for his upcoming birthday, so no model shots this time.

img_00441

Grey with black triangles,  a bit subtle for him maybe? I’m hoping that the super soft plush fleece reverse will win him over and help him wear this more neutral garment. (Also, do you have any idea how hard it is to get non floral, non star prints on sweatshirt fabric?).

img_00461

These are a mash up of the Domi sweatpant pattern and the Ottobre (mock denim) ones I made him previously. I started by overlapping the front and back pieces of the Domi by 2cm at the side seam (to allow for each piece having a 1cm seam allowance) and tracing this new piece for a single piece Domi pattern (so no side seams to sew, but that does mean the Domi pockets as drafted won’t work, fear not though, I don’t want to use them!). I doubled the length of the Domi cuff (to make it more similar to the Ottobre pattern proportions), and shortened the bottom of the leg by the appropriate amount to keep the overall leg length the same. Then I laid my previously adjusted Ottobre pattern on top of my new pattern piece and traced the hole for the pocket, making sure to line it up with the now non existent side seam and adding an extra couple of cm depth at the top (where its straight). I used the Ottobre pocket piece (with an extra 2cm strip along the top) and the Domi waistband.

img_00181

With a little help from my online sewing friends it was a pretty straight forward sew up. First up, someone scanned in their Ottobre instructions since I seam to have misplaced put my magazine in a sensible place, and I couldn’t remember how to sew the pocket, so very kind and helped me postpone a big Sewing Room clean up a little longer.  Next up, I someone else suggested I used twill tape to stabilise the seam and stop it stretching out as I didn’t interfacing ironed onto plush fleece would work well and wasn’t sure how to proceed.  (I used some thin cheap yellow ribbon rather than twill tape in the end).

IMG_0027[1].JPG

The first pocket I made (on the left), had mystery hole/gapage at the bottom corner once sewn up, that I just fixed with some zag zagging (a bit messy but I don’t think anyone will ever notice). I think it might have been due to the diagonal clip you make from the corner down towards the “side seam”, after you’ve sewn the curved edge and before you sew the straight edge. This was neither interfaced nor stabilised by ribbon (as it has no seam). So on the second pocket, I put a small piece of interfacing on the right side of the fabric within the seam allowance where I was going to clip and that seemed to work better (no mystery holes). Unfortunately giddy on success I then topstitched at the wrong seam allowance. You can’t win em all.

img_00481

Comparison shot, so you can see how my mash up compare to the straight Domi’s (left) and last years graded up Ottobre.  The new pairs are back in the cupboard now waiting for the big day. Fingers crossed they meet with approval…

Dennis

IMG_0129

Take a metre each of red and black fleece, divide and cut each piece into 4 identical strips (the whole width of the fabric), sow 7 boring long seams (the width of the fabric after all), topstitch/flatlock/coverstitch 9 horrendously slow times (to hold your seam alowance open and finish the ends), yelp with relief that it’s over as you stretch out your back and shoulders, go upstairs, put the new throw/blanket on the bed of the number 1 Dennis the Menace fan in your life, get a winning smile and a hug in return that will see you through all the yaking of bedtime, however politely but firmly refuse any request to take a catapult to bed…

IMG_0132.JPG


Jasper

Finally, a jumper, for me, nearly made in the last weekend of Jan (hey I was ill) thereby meeting a key sewing goal.

DSCF0231

I know, I know, it’s a bit wierd to start with a back shot and it’s not because there’s an exciting reveal at the front, just I could only get LSH to take 4 photo’s in total and it took some effort getting that many out of him. The back shot is the only one where I don’t look like a complete [insert mild insult of your choice here].

This Paprika Patterns Jasper sweater took sooo long to make. Not actually make you know, that was surprisingly quick, especially one the welt pockets were out of the way. No, it took so long to get  around to making it, as I’d built it up into some impossibly complicated thing in my head, partly due to the fact that there’s a flow chart to help you choose your size. (And also because the test garments on the Paprika website are so swoonworthy I was worried I wouldn’t do the pattern justice.) In the end, I was in such a strop with the Collar Of Despair on the Jumper That Shall Not be Named that I bit the bullet and, with a lot of repeatly muttering “this is a Muslin, a test garment, it doesn’t matter” to myself, I manged to get on with it.

DSCF0230

[Seriously , this is the best shot by far. I may have to find a new photographer.]

As a fit test muslin goes, my thoughts are more space could be used at the bust, which might stop the front hem rising up a little too, the pocket is adding extra layers where there is too much of me to start with (and I forget it’s there when I’m wearing it so don’t use it), I’d like it longer (this is the sweater length, not the dress, but I like my jumpers on the long side), the arms are ok now but were tight (I redid them with a smaller seam allowance), oh and the arms seem shorter now I’ve added the cuffs, which is weird (yes, I did lazilly wear it before adding cuffs).

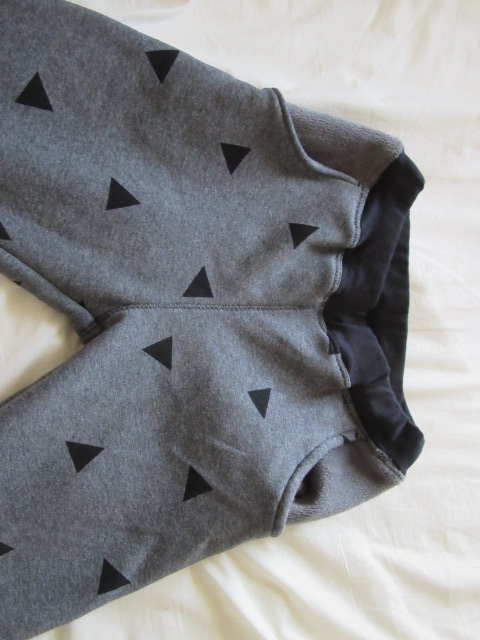
I decided while I was making it that I hated this fleece that I can’t remember buying (but I know it was always earmarked to test this pattern) and couldn’t understand why I chose this colour. I like it better now it’s finished, the colour is not one I normally wear but looks ok on, but the fabric quality isn’t great – I’m not sure how well it’ll wash and wear. I’m also worried that it’s not a good test for my final fabric, being both thicker and less stretchy.

The mental block on this project was definitely getting the size right and working out what adjustments to make. I’ll give you the details of my agonising, in case it helps anyone else.  In the end I took a deep breath, did some careful measuring and reread the instructions on choosing sizes and whether you need and FBA or not:

First up my measurements:

  • Full bust 106cm – size 7
  • Waist 96cm – between sizes 8 and a 9
  • Hips 120cm – between sizes 8 and a 9

So according to the flowchart I needed to print pattern file 6 -10 (based on my hip measurements). Which is good, as that was what I had printed out. Phew. (From a copy shop, this pattern has both metric and imperial copy shop options so I could get it printed easily, hooray! So no taping, double hooray)

Next up, the Full Bust Adjustment (FBA) decision. My Upper Bust measures 100cm which is 6cm difference from full bust and therefore falls in the 4.5-8cm difference C cup range that the size  6 – 10 is drafted for, so officially I was good to go without any adjustments. I find this weird as I wear an F/G cup bra, but I decided to trust the pattern and reminded myself this was a muslin, so it’s ok to go wrong. In the end I traced pattern size 7 for my shoulders and bust grading to 9 at waist and hips and marking my notches as best I could and trying to make sure that the blend started/finished in the same place on the front/side and back pieces. I think the shoulders fit ok, but a FBA would actually have been a good idea. Then again, the arms were tight so maybe I should do a size 8 top half grading to a 9 for the waist and hips? Or do I need a size 8 with and FBA grading to a 9? And there’s quite a lot of fabric around my centre back so do I need a different size at the back to the front, which is surely madness, or a sway back adjustment? Arrgh, fitting is hard!

As the markings for the welt pockets are different for each size, I lined my welts up with my lower dot on my pattern front (where my pattern was definitely size 9) and then just made sure they were parallel with the edge of the pattern piece (as I hadn’t been sure where to put the top dot as at that point my line was in the middle of blending from the size 9 to the 7).  I cut the pocket pieces a straight size 9, centred them on the front piece and trimmed the excess off to make them match.

After the welt pockets it was pretty easy actually. Just kind of sew it together. And there’s a great tutorial for the welt pockets. The only I did get a bit confused was whether I was supposed to sew the bottom band through the pocket as well as the front or not, in the end I decided not. The only thing I would change  construction wise is when trimming the seam allowance at the neckline, I would grade it so the longest piece is on top and then when I topstitch it would hold everything down together.

So, in conclusion, I need to be less scared of getting started and less precious about my muslins. This jumper is fine, I would find it perfectly acceptable size wise if I bought it in a shop. The pattern is great, seems well drafted and had lovely clear instructions. I definitely do want to make it again in my earmarked precious fabric, with a hood next time and in the dress length (if I have enough fabric). I will almost certainly leave the welt pockets off, seeing as I find them unflattering and not useful, however this is my personal preference, because on the test garments they look great. I’m still dithering about what size to use especially as the next fabric will be both thinner and stretchier.


Grown up stash busting

So, I decided to become a grown up member of the Stashbusting Group and actually work out how much fabric I have (everyone else posts monthly totals of amount of fabric busted and bought, I never know!). See Judy’s post on effective organising.

We’re moving rooms around at our house at the moment (a long, slow process). Most of my fabric is actually in  a cupboard of what will be the sewing room / study / place where my husband can work from home / guest room. But there are a couple of tubs of smaller pieces of fabric (I’m rubbish at throwing things out) in another cupboard upstairs and a few piles of stuff in process in our dining room.

I thought I’d start with the cupboard of where stuff should be as it’s not so long since I sorted that out so it’s already quite tidy ;).

IMG_3706

First up, sweatshirt/jumper fabric. All of this bar the scrappy piece was bought last year (2015) as I’m in dire need of new jumpers.  I really want to make at least one by the end of January (actually I want to make 4 or 5 but I’m trying to be realistic here).

The two on the left are fleece backed cotton  sweatshirt fabric, the greeney grey one was screen printed by me in places when I went on a course back in May and I want to use it to recreate my favourite worn out old jumper. I wasn’t sure if it would be light enough to print on, so I got the latte coloured one at the same time. I don’t like that one so much, but it was a safer bet printing wise as you need to have a pale enough fabric to show the ink. I plan to do a little printing on it at home and make up a wearable muslin for the recreated jumper.  There is likely to be some left of both fabrics afterwards, possibly enough for another adult garment, probably enough for a children’s one.  I’m trying to learn from past mistakes and not make too many plans for leftover fabric only to find out I considerably overestimated what I would have left! (But, err, a friend might be wondering if you could dye the beige stuff coffee coloured with left over coffee grinds).

Next up is some green fleece that I bought to make a muslin of the Jasper Sweater – I have the pattern and got it printed out at a print shop so no taping to do! I have got no further as it has princess seams and I think I might need an F.B.A. – new skills, eek. Once I’ve cracked it, the blue looped back stuff next to it will another, better, Jasper sweater, with a hood – the blue/green splodgey jersey on top was bought to be the hood lining.

I got the black looped back sweater knit at the same time as the greeny-grey and latte stuff. I’m not sure what my plan was for it then but now I’m thinking a hoodie for me.

The turquoise fleece was bought to make a cardy for my daughter. I tried cutting out the Jalie pattern for the sew a long back in October but trying to get the first piece cut out with the dots straight drove me crazy and that pattern has so many pieces! So I need to find something simpler. And possibly some red ribbing to go with it. (I love red and turquoise (hmm, maybe I should just recreate that pattern hack) and then I might be able to use the rest of the turquoise cat buttons).

Finally there’s a leftover bit of sweater knit from the hoodie that I made my son in 2014, not big enough for a whole garment, but maybe a kangaroo patch pocket on another garment?

Phew, that’s a lot of words for only a portion of my stash (albeit the bulkiest portion) so I’ll stop now. But I have managed to get all of these on a spreadsheet (with width and lengths on, I just can’t bear to use only one measurement for things that have area even though it would make life simpler!) so I’m feeling all grown up! Lets see how long it lasts.

Have you started on your New Year Sewing plans/resolutions yet?


Nothing like a deadline.

Ta Da

Ta Da

Life is busy sometimes. I’d been planning this a little while, but only started tracing the pattern yesterday afternoon. Finished in the early hours of this morning for his birthday today. Cutting it fine.

too busy opening presents to pose

too busy opening presents to pose


I’m not going to look at it too closely, cos I’m sure the sewing could be better (the seams are fine, it its the more visible pocket application and bindings that have room for improvement). But it is finished, it fits, and he’s worn it all day (despite it not being school uniform, not sure how he managed that).

side seams inside and out

side seams inside and out – you can just make out the reverse of the red fleece is looped

The idea was to replace a snuggly hooded fleece top that he’d grown out of. The pattern is a mash up of two hooded tops from Ottobre 4/2014, mainly the older boys top (number 39) but with the hood (and hence necklines too) of the girls top (number 37) as I couldn’t be bothered with plackets and buttons I preferred the look of the cross over hood. I also extended the sleeves by the length of the ribbing and left that off, and added a kangaroo pocket.

topstitching the seam allowance down

topstitching the seam allowance down

The skull and crossbone fleece was a holiday purchase. I can’t remember which came first, the decision only to buy a precut 1/2m length, or the choice to mix it with a contrasting solid. The red came from my local fabric shop and has a looped back. I knew the fleece wouldn’t fray so didn’t need a seam finish, but I was worried the seams would be bulky, so I topstitched the seam allowances flat (everywhere except the sleeves, as that wasn’t possible). I used black thread throughout, as I was feeling lazy a design feature.

binding

binding

I bound all the raw edges with strips of contrast fleece as if it was bias binding (not that it was cut on the bias mind). This is how the original hoodie was finished. Some worked better than others, probably as some were different widths than others.

Overall, I like this a lot, but would never enter it for a competition. My main issue constructing it was sewing the hood binding to the bottom edge (the one that gets sewn to the main jumper) by mistake, rather than to the front edge. I always struggle telling which way up an unattached hood is. That was 2 rows of stitching to unpick, stitching that had sunk into the fleece. Gah. Overall the fit is really quite skinny, even on my beanpole, maybe that’s bad fabric choice, the model looks to be wearing more a thick t shit fabric. It’s fine for now but I worry he won’t want to layer it over long sleeved tops and that it’ll be too tight before the arms are the right length.

I can’t comment on the sewing instructions as I ignored them, but the pattern was just fine, just be aware of the skinny fit. Oh, and I love the fabric combinations, my favourite bit, the two together are better than the sum of the parts. Slightly more grown up than his last top, but still fun, and me made this time.

Pass the Parcel

So, do you like surprises? I decided to be surprised this week, I was ordering online from the Organic Textile Company and I spied that they did mystery bundles of remnants (under clearance) and decided to go for it. Well, my parcel arrived today (less than 48 hours after ordering, pretty speedy) and I’m pretty pleased, although I’m not sure what I’m going to do with all of it.

sweatshirts

sweatshirts

First up some sweatshirt fabric, which wasn’t part of the bundle. I needed some fabric that isn’t “too dark” for an upcoming project and had decided on their grey marl fleece backed sweatshirt fabric (on the website under fleece). However, when I went to order it was sold out. I have a deadline for this project, so I dithered between getting some green instead or some latte. So I got both. And some black (well, I’ve had a black sweatshirt project in the back of my mind for a while and I find this stuff hard to come by). The fabric is 180cm wide, I expect some shrinkage but that’s pretty wide all the same. I got the carbonised black, which isn’t fleece backed. I am very happy with all the sweatshirt fabric. The “natural green” I would describe as sage, it’s a grey green. The latte I would describe as camel. It’s not a colour I would usually choose, but I wasn’t sure if the green would be light enough for my purposes and I didn’t think I had time to order swatches (considering how speedy they were I probably did). The fabric is lovely, my only complaint is that they only sell black ribbing (which I already have), matching colours would be nice!

Next up, the mystery fabric bundle…

knits

knits

I got three knits in there. The stripes and the seals are amazingly soft, they would make excellent baby clothes. Not quite sure what I’m going to do with them as we’re not really a pastels family (far too messy), but I’m wondering if I can squeeze some summer pajama’s out for the kids. There is less than 70cm of each, but they are 140cm wide according to the website (however I measured them at 1m60). There’s also about 60cm of the navy, which is only 135cm wide. I’m pretty sure this is their single jersey, which I also ordered samples of. The colours of the samples are excellent, really vivid, but (presumably as it’s 100% cotton with no lycra or other stretchy synthetic in the mix) this is not as stretchy as I’m used to (although the seals/stripes are and they are also listed as 100% cotton?) so I don’t think I’ll be ordering more.

prints and brights

prints and brights

I got two prints in there. Approx 70cm of (fairly loose weave I think) linen with a bird print, hmm, what to do with that. And 90cm of a wonderful tree print with mad red birds on cotton that I have absolutely no idea what to do with – I think it’s blouse weight. Also a 1m50 square of really bright green linen. Think I’m going to have to dye that to tone it down. Likewise the lilac corduroy, of which there’s enough to make “something” for the girl, or maybe a bag.

plains

plains

Mostly I got plain farbic, as per their bundle desciption. My favourites are the double shot red/black cotton (only 65cm, maybe I can squeeze a shirt out for the boy) and 1m15 square of goldey yellow bamboo cotton mix whihch has a lovely drape to it. I would never have picked this but I think I might actually make me a top from it, rather than a dress for the girl. The teal is a favourite colour of mine, the white is very soft, the beige is a thicker weight, could be childs shorts in a different family.

see through things

see through things

Finally I got various bits of see through stuff. A small amount of broderie anglaise – sleeves and trim for a girls dress? (except she has plenty of dresses). Something with a slightly textured wave design, that’s not as sheer as the others, I may try dying this blue. A pretty net curtain fabric, sorry, that’s all I can possibly think it could be used for. And a quite coarse/stiff natural coloured muslin, that surely could only be used for straining marmalade etc.

Overall, I’m pretty pleased. Obviously if I’d been braver and got the bundle of larger lengths I would have more options for making things, but then I might have large amounts of fabric I didn’t like (not to mention an even smaller bank balance). Now it just remains to see how much of it I manage to sew up.

Have you ever taken pot luck on fabrics? And do you have any genius suggestions of what I can make with my tiny bts if faric (9 out of 16 are less than a metre long).