Pledges, socks and jeans.

Right, first off, before it’s too late,

I, ProlificProjectStarter, pledge to wear at least one Me Made item every day in May.

Last year was my first MMM, I think I pledged to wear something me made 3 or 4 times a week and I actually managed to wear something every day. I now have more self sewn stuff in my wardrobe and wear a lot of it often, so lets see where the pledge leads me to this year.

Second, I’m going away this weekend, so I decided to find out a sock pattern so that I have something to do while I’m traveling. This is my first attempt at socks, I bought some pretty bamboo needles especially as I didn’t have any small enough. Fingers crossed I don’t get Second Sock Syndrome.

Lastly, I finally have some photo’s of my Ottobre jeans!

As easy as falling of a log brick

As easy as falling of a log brick

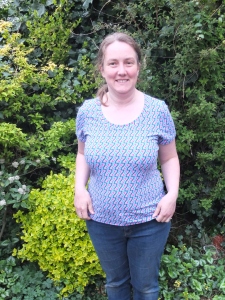
So, the fit is definitely not perfect. But it is wearable as proven by the amount I’ve been wearing them.

I was actually directed to "stand on that brick" by my photographer. Serves me right for nobbling him on his way to work I suppose.

I was actually directed to “stand on that brick” by my photographer. Serves me right for nobbling him on his way to work I suppose.

My mum declared them to be very well fitting and I didn’t even ask her. (This is an amazingly positive comment from a woman who is not known for mincing her words).

and the back

and the back

And I may have shown off and told people I’d made them a couple of times. To general amazement.

and the side

and the side

(Is there an ok way to show off your home made clothes to people who don’t sew?)

Ugh, fold of fabric at the front

Ugh, ugly fold of fabric at the front

So, to make sure I don’t focus too much on my failure for perfection, here are my shop bought jeans. My only pair (and these were only bought after many demoralising tries to find something halfway decent).

more wrinkles

and a few wrinkles at the back

I think my homemade ones fit better.

basted first fit

basted first fit, no zip at this point

My muslin started with an inch seam allowance. Which meant after my first basted fit I could extend the crotch length a little, which has improved the fit, but I think I will add more crotch length next time. (Initially I just added length to the front pieces, as I did on my Junipers, but I went back and added it to the backs as well which improved some of the smiles at the back too).

baggy waistband

baggy waistband

The other fitting adjustment I made was to pinch out some of the baginess at the centre back. I just altered the back centre seam so it curved in. I’m not sure that was the “right” thing to do but it has helped.

So, now I’m off to make sure I have some Me Made Clothes packed for my weekend away so I can get my pledge off to a good start. And who knows, maybe I’ll manage to get a second, slightly better fitting pair of jeans before the end of the month. (I can dream, right).

Quickie

I’m still sulking with the stripey fabric I have to make Jalie 3132. As it’s stripey, I did my usual trick of tracing the pattern piece and then flipping it to trace the other side so I can make sure the stripes are horizontal (a much better option than cutting on the fold). But I couldn’t get them straight 😦 The general consensus of all the helpful people on the facebook stashbusting sewalong page is to cut full pattern pieces, rather than half ones designed to be cut on the fold. So, this is the plan, when I can be bothered to retrace 3 pattern pieces at twice the size they are now (the sleeves are cut on the fold two, which is a new one on me).

In the mean time I have made one and half pairs of modesty shorts for my daughter. She got 2 nighties for her birthday, pretty with a few flounces, just up her street, but they are indecently short. This isn’t normally a problem, but so I don’t have to hide them when we have visitors staying, I decided to make some shorts.

new shorts

new shorts

This was really quick, I used the Ottobre sweatpant pattern I already had traced out for her brother, folded it up to shorten it and left the pockets off. Job done.

she likes these ones

she likes these ones

I cut the waistband the same width as the pattern piece but half the height as it’s designed to be made with pull cords. There was an annoying small bit of ribbing leftover, so I traced around a biscuit cutter to make an applique butterfly. I even remembered to iron interfacing on the back (big help). I thought it would sort of match the fairies on the nightie but it turns out they’re ballerina’s, whoops. Never mind, she still likes them and I’m half way through the next pair.

Off to bed

Off to bed

Ambling along

Hello there, how are you this fine spring evening?

I’ve had a bitty few days sewing, things have been getting done, but not that much to show for it yet. The boy and I are supposedly working on a joint project but I can’t do much on it until he gets his bit finished. Currently he’s about half done and stalled.

concentrating on a bit of embroidery

concentrating on a bit of embroidery

I did a bit of mending/adjusting/finishing yesterday. Including hemming my second attempt at the Day to Night Drape top and finishing the last bit of seam allowance on my Tova. (Left at the time as I was considering pockets.) Both are now with the same friend who got my first attempt at a Day to night Drape top, along with the dress she asked me to take up the hem on at the end of last summer (it was pinned and took approx 5 mins to my shame). I decided, after having the Tova on my “alter it in some magical way so I want to wear it pile” for about a year, just to give it to someone that’ll wear it. I’ve also given the copious amount of leftover fabric to another friend.

So today I started work on the Jalie 3132 top I got given in the Curvy Sewing Collective Christmas swap. I’m making the (shorter) hip lenth, with 3/4 length sleeves and v neck in some pink and grey stripey fabric from my Slightly Seasoned Pretties layer (bought back in November with a birthday dress for the girl in mind). If it turns out well I have a recently purchased something from my Pure Excitement Layer in mind to make a second one.

FBA done, just the bottom curve to smooth out

FBA done, just the bottom curve to smooth out

However, I got frustrated trying to get the stripes horizontal and have now started some modesty shorts for The Girl to go with the extremely short nightdresses someone gave her for her birthday (I’ve had longer tops).

Speaking of which, I might try and put a quick waistband on one in time for bedtime.

See you later, happy sewing!

Hoxton Bonnets

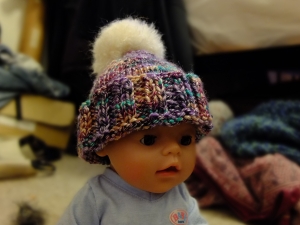
Remember this hat?

 tiny sunhat

tiny sunhat

Well, it made it all the way over to Perth, Western Australia, and after a false start

they figured it out in the end

(so, the photo’s are huge due to my ludditeness, but hey, they have a baby in, so I’m sure you’ll forgive me).

If you’re wondering about the kimono top, it’s apparently on a teddy. This young lady is growing FAST.

Anyways, they asked for matching hats. Matching knitted hats with huge bobbles (a.k.a. Hoxton Bonnets, as any Radmac listener will tell you).

I struggled a bit with this request as a Brit, we all know Australia is land of eternal summer, cold lager, swimming pools, barbeque’s and dangerous animals. But apparently it gets frosty in the mornings in Perth in the winter. Plus they’re planning a trip to the northern hemisphere at Christmas.

I still had this hat lying around at home and no-one in these parts is going to want it any time soon, so I rootled around in my spare yarn bag, dug out some needles, bought myself a new fangled pom pom maker and got going.

hmm

hmm

I managed a blue and green variagated hat, so it half matches the green one.

awww

awww

The stuff I used for the baby hat is lovely and soft. I had to guestimate the size as I’ve never done one that small before and I don’t know how big her head is.

the post it note is nothing to do with me

the post it note is nothing to do with me

The pom pom makers were easy to use and much faster than the old-fashioned cardboard disc method.

up close and personal

up close and personal

The baby hat is plain stockinette stitch, but the blue and green I did a sort of purl zig zag on the side. Which doesn’t show well, but it adds texture.

Now, to post them up to my friend so she can include them in her next parcel to Down Under.

Trust him to want to model all 3 hats at once

Trust him to want to model all 3 hats at once

When is a sewing success not a success?

When you manage to piece together nearly all the scraps from your last two projects to make the lovely garment you envisaged, all your pattern hacking came out ok, nothing went wrong, no seam needed unpicking, it fits fine, a little growing room but doesn’t look too big just as you hoped and then your daughter declares it to be unwearable.

Apparently it is too long to be a top and too short to be a dress.

Sigh.

I think trying to get her to try it on with her denim shorts didn’t help. They were ok last summer, but that was a life time ago when you’re seven and the “I don’t wear trousers” has spread to “I don’t wear shorts”. Sigh.

Needless to say, there are no modelled photo’s.

inspiration

inspiration (please excuse the bad photo’s, I’ve waited all winter to be able to take them outside and now it’s too bright, gah!)

This tunic top was my inspiration. She loves wearing it, with it’s big flarey gathers into a pretty yoke. But in navy blue with long sleeves she isn’t going to be wearing it for much longer in all the sunshine we’ve been having. And she’s about to grow out of about half her short sleeved tops, there are only 3 that stand a chance of fitting her next summer. So the obvious thing to do seemed to be a short sleeved gathery fluttery top, a bit pretty, long enough to last at least next summer as well as this.

front

front – the pockets are level in real life, honest

I think it came out well. The heart fabric is good quality and quite thick, but the navy denim effect jersey is lightweight and quite flimsy and would be quite cool to wear I think. I hacked my good old trusty Simplicity 1573 pajama pattern, making the yoke finish just below the armholes, just to make life easier so I didn’t have to worry about attaching my sleeves over the fabric change. Also there was no more length of the navy than what I used so I couldn’t really have gone much smaller on the yoke as I wanted a slightly long top that would last a year or two (the top, being big 4, is plenty wide enough in the size 7 (her age), without being overwhelming). I think a smaller yoke looks better, in the unlikely event I ever make this again. The navy fabric is 1 1/2 times the width of the yoke, gathered, hemmed, seam allowance pressed down. The pockets just about used the last of my heart scraps up, I like that they balance it out. (They were also slated as being too small to fit her entire hand in at once.) Do you like the contrast pink topstitching at the bottom because I ran out of navy?

back

back

The back yoke had to be cut in two pieces but I got it matched ok (I wasn’t trying for perfection on this one, just getting all the pieces out of my scraps was hard enough). I had to piece the navy too, but I couldn’t make the seam go down the middle. I considered cutting it again and having two symmetrical seams but I really couldn’t be bothered. Then, after all that, it was a little wide, so I put a pleat in the centre (I couldn’t even be bothered with gathers at this point).

neckline elastic

neckline elastic, which is very hard to see as it’s clear, it’s hiding under the zig zags, honest!

I didn’t really have enough left of anything for a band, so rather than just fold the edge over and stitch it down, I tried the technique from the back of the Day to Night top. I sewed clear elastic (which I prestretched then let relax as per the instructions) in the seam allowance with a zig zag. Then I turned it over and topstitched it down with a twin needle. I’d like to see how that wears, but I’m not going to find out am I!

The t shirt has been left at a friends house to see if her daughter will wear it (she’s the same size as my girl). I wasn’t upset that my daughter didn’t like it (after all, she hadn’t been requested it or been involved in the design process) but she was quite rude to me about it which just made me want shot of it rather than keep it hanging around in case she changes her mind.

So, next time, I reckon I’m due a garment that fits and is appreciated by the person I make it for, right?

Some you win, some you lose

Do you ever find that getting things done helps get more things done? After the success of Fridays new t shirt I felt bouyed up and ready to tackle the Full Bust Adjustment on the Maria Denmark drape top pattern.

And it wasn’t as bad as I feared, as the pattern is just a normal t shirt pattern from the armholes down, so I measured and worked out and did a FBA and then took out the dart and I was feeling pretty pleased. I even got the pattern pieces cut before bed and was looking forward to sewing them up the next day and having a new top to wear and then cutting another one and sewing that up too.

So, next days sewing started out well. I have some clear elastic now so I was able to follow Maria’s instructions this time and very good they were too. Before long I had a top with a cowl next thingy and sleeves and side seams all ready to try on….

What a difference a day  makes (photo courtesy of The Boy who made a dress)

What a difference a day makes (photo courtesy of The Boy who made a dress)

And it was too tight again! With the drag lines between my “bust apexes” (or should that be apeces?).

Not quite sure what went wrong. I definitely added 3cm to the pattern piece, which is 6cm to the top front as it’s cut on the fold. I compared the pattern piece to the last one and it’s not much different.

Needless to say, it’s going off to the same friend as the last one. Once I’ve stopped sulking at it and hemmed it and finished the neckline. Which may take a few days.

I have a couple of other things to do for her too. A ridiculously long maxi dress she gave me to alter at the end of last summer than needs taking up. And the Tova top I made that has been sitting on my pile for about a year waiting for me to “do something with it” to make it wearable. My mum thought it needed taking up as it was too tight in my hips. I thought it was too baggy in the small of my back and too tight in my bust. But after a year I’ve decided that really, I can’t be bothered, so it’s going to my friend too. Once I’ve finished the side seams.

I know I’m not the only one. I loved seeing Sew South London beaming in her new dress that Thimberlina had made. And if Thimberlina is anything like me she’ll be pleased as punch that someone is appreciating her hard work and it was completely a wasted effort.

While I was at it I also gave the huge amount of left over fabric from my Tova to a friend who’s daughter is going through a monochrome phase. I had thought about making a different kind of top for me with it, but I hadn’t got around to that either.

Anyway, back to the drape top. What do I do now? Give up on it all together? Or try one last time. I wondered if the drape top is supposed to be clingier than the Birgitte, so maybe I could trace the bottom of the armhole down of the Birgitte and then try and match that up to one of the larger pattern sizes of the Day to Night Top. I think that might work. But if it goes wrong then it’s going to be a bit embarassing to give my friend 3 iterations of the same failed top.

What would you do next?

Sometimes you just need a quick win

This week has been slow sewing wise. Actually, that’s not entirely true, the other day I had a mending blitz and replaced a broken strap clip on hubby’s favourite bag as well as replacing some stitching on a leather patch on the bag before it came off taking the other end of the strap with it. Then I fixed a coat the Boy has just grown out of so I can pass it on, fixed one of my dresses, one of the Boy’s pajama top and finally got around to adjusting the elastic in the Girl’s Christmas skirt. Phew.

But new things making wise, it has been slow.

Partly this has been due to non sewing things, but I realised yesterday it was also that I was also a little bit put off by my plan for this week. I have 2 pieces of material I’d like to try the Day To Night top again. But after last time, I need to try and fiddle with the pattern a bit (although I suspect my friend wouldn’t mind so much if I gave her another iteration or two of that top as she really likes it). And the thought of working out how to do a FBA on a drape top seemed hard. So I kept waiting for the right time to start. Which never seemed to come.

So, today I switched it up and did a project from further down my to do list. A remake of my favourite Birgitte T shirt, in some scrumptious new fabric I got when in a recent splurge on the Kitschy Koo website. There’s not that much to say about the make, I used the same full bust adjustment (FBA) on the front as last time (which adds 3cm to the pattern piece so 6cm to the fabric as it’s cut on the fold), but I used the unadjusted sleeve this time.

Wanna see?

the front ....

the front ….

Can you tell I’m pleased with it? Although those creases pointing at my armpit make me think there is a little room for improvement (maybe it needs even more adding in the bust?). Although I was wearing the 70’s Birgitte cut from the same pattern pieces yesterday and I’m pretty sure that one doesn’t have those creases.

... aand the back

… and the back

I think doing FBA’s makes my back’s fit a little better, as the t shirt back is only a large (it would need to be XL or 2XL if I wasn’t doing a FBA), but there’s still folds of fabric in the small of my back. I think the next step is to investigate what sway back adjustments entail, unless anyone has a better suggestion?

Image of Stripy Hearts Blue and Pink cotton jersey (by the half metre)

For some reason the fabric seems a little out of focus in all my photo’. It’s this print which I bought from Kitschy Coo (and the above photo is from there too). The fabric is lovely quality, all the fabric I’ve ever had from there is lovely quality and it wears well, so I don’t mind the price so much as the much cheaper t shirt fabric I got last year is pilling like crazy (unlike the heavily worn t shirts I made the kids from fabric from this source). And did I mention the service is great too? Amanda is even patient and understanding with daft customers who hassle them about missing orders which turn out to be due to the customer giving her the wrong address.

The other place where there is a small room for improvement is the neck band, which doesn’t quite lie flat. Probably due to a combination of it being quite wide and being in self fabric not rib. I didn’t have any appropriate rib and wanted it to have a whole depth of a heart on, which I managed and looks nice, so I can live with the slight wobble.

action shot

action shot

Overall I give this make 9/10, it was quick to make, nothing went wrong, the fabric is lovely and wearing it makes me smile. I’ve even made a start on adjusting the pattern pieces for the Day to Night top.

First Swallow of Summer

I’m not sure if finding a bargain second hand item that you know you can transform is luck or judgement, what do you think? Either way I don’t usually have the knack.

before

before

However, this time, I could see the potential in this adult top which was £1 and we both liked the fabric. We even saw sandmartins (which we thought were early swallows) the day I finished it – which made the fabric even more special for us.

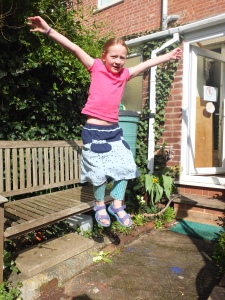
jump for joy

jump for joy

I found some co-ordinating quilting cotton bought for a project that’s fallen off my list and I was away.

back view

back view

I just made it up as I went along, cutting the top across just below the button placket and reusing the original side seams and hem. I gathered it slightly into a blue band I made with A line sides. A navy waistband as well seemed like it would be a bit too much navy, so I added a strip of flat piping in the seam from the bird fabric to break it up. It’s slightly wobbly, but I think I like it.

pockets

pockets

That just left pockets, an essential for a girl to keep her stones/tissues/hairclips/treasures in. They needed to overlap the colour change to be at the right height, so I couldn’t work out if I should make them navy or birdy, I felt either would look wrong. Eventually I hit on this combination, with a little help from this tutorial and I really like the result.

And as an added bonus, I found out half way through it fits with the April Put a Bird on It challenge over at the Monthly Stitch.

Anyone else putting a bird on it this month?

Zip it up

Ottobre design 5/2012, how your minimalist zip insertion instructions intimidated me. How I longed for a diagram. And yet. After stepping away for a bit, when I came back to the zip it seemed to go in really easily. Minimal and yet complete. Still, a diagram wouldn’t have gone amiss.

As I plan to make these again, I thought I’d take notes to help me next time. So they’re here as well, in case they ever help anyone else or in case anyone else feels like enlightening me on what I could’ve done better. I don’t claim to be an expert, I wasn’t convinced I knew what doing at times. But it seemed to work in the end.

Finish raw edges of crotch seam allowance. Stitch crotch seam from back waist to bottom of zipper placket.

So far so good. Seams finished with use of overlocking foot. Zipper placket, that’s where the bit where one of the fronts has a stickey out bit that the other doesn’t, right? Crotch seam duly sewn.

Finish raw curved edge of fly facing. Pin and stitch fly facing to right placket edge.

a

This was straight forward, once I’d worked out I had cut a mirror image of my fly facing and recut it the right way around.

Understitch seam allowance to facing close to seamline. Fold fly facing and pants front wrong sides together and edgestitch along center-front edge.

b

understitching

Simple enough. What’s next?

Fold fly shield piece in half, right sides together, and stitch it’s bottom edge.

Which edge is the bottom? Err, it must be the slanty one, right, cos there’d be no point having that slant inside the seam allowance at the waistband surely. And that would make it the right way up on your picture of all the pattern pieces. OK, I’m 90% sure it’s the slanty one, lets go for it.

Turn fly shield right side out and serge of siz sag its open edges together

c

fly shield assembled.

Pin and stitch left zipper tape to left edge of fly shield

Left zipper tape, this kind of thing always confuses me, that’s the bit that will be on the left when I’m wearing them is it? So the bit on the right as I look at it. Ok, so I need to pin it to the left edge of the fly shield. Hang on, which is the left edge? You haven’t told me this have you. And as it was folded in half during it’s construction it’s not clear from the picture of the pattern pieces either. Grr….

At this point our author sulked, went off, read a different fly insertion tutorial (done completely differently so it just confused her more), mulled it over and then came back

The folded edge must be the one I see once its constructed surely, so I’ll pin the zip to the finished edge, that has to be right.

d

zipper sewn to fly shield

Pin and stitch fly shield to left placket edge, right sides together and with zipper in between.

e

fly shield duely stitched to left placket edge

Turn fly shield right way up and edgestitch seam close to zipper

f

This is looking promising.

Close zipper and pin fly in position from right side, matching centre front marks.

Centrefront marks? Surely I marked those? They must’ve got rubbed off. Oh well, that looks about right….

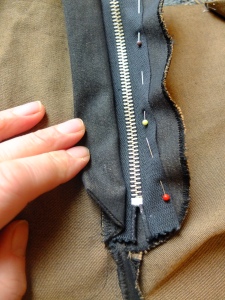
Turn fly wrong side up and pin free zipper edge to fly facing only (not to pants front). Remove pins from right side, open zipper and stitch it to fly facing carefully.

g

In the process of attaching zipper to fly facing only

Close zipper, pin facing to pants front and topstitch fly, using pattern piece for fly facing as template (flip fly shield out of the way as you stitch).

h

Using fly facing pattern piece (which has no seam allowance added) as my template to mark stitching line. The pins are holding the fly shield out of the way so it doesn’t get stitched accidentally.

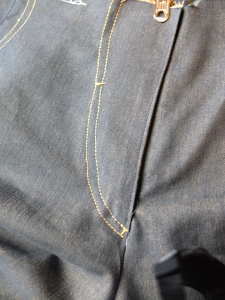
Topstitch crotch seam with two parallel rows of stiching

I swear this was not in the instructions when I was sewing. I missed this step out. I noticed later the stitching lines on the garment diagram and “knew” this step had been missed out of the instructions.

Stitch bar tacks on fly as shown in design sketch

Bar tacks, zig zag stitch length 0, that’ll do right?

i

My slightly wobbly topstitching and bar tacks

Fairly painless in the end, once I’d got over my sulk at being expected to know which was the left side of the fly shield. I knew I’d inserted flys ok before on The Boy’s trousers and my moss skirts which only made it worse. I did contemplate following the grainline moss zipper tutorial but I have got seriously confused in the past switching instructions – the pieces are never quite the same shape or referred to in the same way. Plus it somehow feels wrong to not follow the “right” instructions for what I’m doing, but maybe that’s just me? Although with things I’m more confident on, I just surge right ahead and do things the way that makes sense to me, so maybe I just need more practise?

Do you have a set methods for doing things that you do regardless of the instructions or are you a stickler for following the pattern to the t?

Impulse trousers

Hows the weather round your way? Here we’ve had three days of glorious sunshine, our first t shirt weather of the year. So today I dug out the kids shorts and found that I’d got rid of all but one pair of my daughters at the end of last summer and that pair is now too tight.

So I went upstairs to rummage in my fabric box – a quick pick me up of sewing would do me good I decided. I had comfy knit fabric shorts in mind, but my knit fabric box is looking rather depleted, awaiting the fabric I ordered that has mysteriously vanished on route (the vendor is currently chasing the carrier as their system is showing it as being delivered and signed for). I had a rootle but there wasn’t much appropriate and the Girl was being quite rude about what there was. Indeed she was being quite rude about the whole concept of me making her shorts.

So, I decided to make something for someone who might appreciate it instead. We were picking up some shoes from our favourite cobblers earlier this afternoon and the woman serving me asked me where I got the Boys’ trousers from. Unfortunately for her the website they came from, which sold Scandanavian labels in the UK, is now defunct. I loved lots of the styles, fun bright colours, this particular pair were bright blue with large yellow and white stars on.

front

front view

I had a little of the fabric from his star t shirt left. Not enough to make anything for any of us (except possibly more comox trunks), but apparently her son is a not so tall 3 year old.

I whipped out my Ottobre magazine, worked out that a size 98 seams to be about an age 3 (everyone needs growing room right), traced the sweatpants I’d made before in size 98 and discovered I had enough fabric, yay!

back

back view, not very different really

So, 2 hours later I had some approximately age 3 funky trousers. With pockets. And cuffs made from left over scraps of ponte (one of which is grey on the inside as the scraps weren’t quite big enough). I didn’t bother doing 2 tone cuffs. And I did the waistband a little differntly as I wasn’t using a drawstring, I used the width of the pattern piece but less height. It’s cut from 2 old t shirts and the elastic is sewn in at the centre and side seams, but is safety pinned togheter at the back with a gap left so it can be adjusted to fit (as I have no idea of the dimensions of this young man).

inside

the insides, including mis matched cuff (but you cant see the ribbon I put as a tag in the centre back)

Job done, we hopped on a bus to deliver it and arrived 1 min before the shop was due to shut by my watch. But maybe my watch is out as everything was already locked up. So we shoved it through the letterbox. No paper with us to write a note. I hope they work it out ok! And I’m also worried I’m going to come across as a complete wierdo. Would you be worried if someone shoved unexpected items of clothing through your place of work? Oh well, too late now.