IMG_4018

Sometimes, saving fabric scraps can be useful for mending. Yesterday I managed some pretty good pattern matching to patch a hole on the Boy’s favourite trousers. Not exactly amazing sewing, but I’m feeling pretty smug right now. I haven’t told him about the hole or the patch, I’m curious to see if he notices!

I also managed to finally mend the cycling jacket that hubby ripped on a rosebush last summer (whoops) and the unravelling cuffs on my festie (a fleece lined knitted hoodie to where when camping at festivals). The latter was in anticipation of trying out our new van this weekend. Unfortunately not long after phoning us to say it was all ready to pick up the garage phoned back to say that they’d double checked the new seatbelts and one of them had broken when tested.  Best place to discover the fault though.

So, not much actually sewing here, but I need to get cracking as I accidentally came back from buying a replacement jeans button (cannot find the one I bought before anywhere) with a haul of fabric. Whoops.

A brace of Anya’s

IMG_3985

So, all that thinking about making bags reminded me that I hadn’t made the Anya Bag pattern up yet that I won before Christmas. It was a condition of winning that I blog a bag within 4 months, but, you know the drill, all opinions are most definitely my own.

IMG_3961.JPG

I had a plan to use this to make something for my friend (as I’m not really into handbags), but that idea wasn’t with scraps. Now Zoe herself says this bag is a great scrap buster and as I know that she is into reducing the impact of her sewing and as I had just posted all about sewing bags from scraps, I thought I really should have a rootle in my scrap bin for something appropriate to try the pattern with. What I found there was some left over cerise boiled wool from making a Princess Anna inspired cape   – perfect.

There were two little problems I found when cutting out. The first was that it was, err, oh so very very pink. Extremely pink. I felt it needed breaking up a little. So I had another rootle and found some more boiled wool scraps, green this time (from a waistcoat for LSH) and improvised a little leafy design. It came out rather well if I do say so myself. As the boiled wool won’t fray I didn’t have to worry about finishing edges or even sewing them down. I just cut the leaves out, tried some arrangement, pinned when I was happy and then sewed them freehand on my normal sewing machine.

IMG_3991

The second problem was that I didn’t have a big enough piece of fabric left to cut the straps and by this stage the bag was looking quite smart so I didn’t want to piece some together. Instead I bought some from my local fabric shop. There was a limited range of colours, so I chose navy, which matched the print on the lining.

The lining wasn’t techincally scrap, but it did come in a bargain bundle of fabrics and I’ve never been quite sure what to do with it. It’s perfect for a lining though, pale yet interesting, and the tree’s inside match the leaves outside.

IMG_4011.JPG

Next up, bag number 2, for my friend, who is not really a pink kind of person. I was quite happy to make 2 in a row as this is a fun, quick pattern and I also wanted to see how it looked in different fabrics. This is my Zombie Apocalypse version with a blood splatter velvet pattern on a soft drapey denim. This time, the outer is new fabric, and the inner uses scraps, red for the yoke and white waterproof lining fabric for the inside (which was hell to work with).

So, pattern review then.

PDF: short and sweet (4 pages), taped together easily, full marks.

Instructions: very comprehensive, lots of photo’s, in fact, I was finding them a bit too detailed, then I found the condensed 1 page version at the end which was just what I wanted. So something for everyone. Full marks again.

Difficulty: Fairly easy, there are pleats, curves and an optional buttonhole (but you could use a secret snap/popper) and all well explained so I think a beginner would be fine with this but maybe not as a first project.

Pattern drafting: Good, everything matched up tickity boo.

Trickiest bit: The button tab, surprisingly. My first attempt ended up a little wonky and unsymmetrical and it was really noticable. So then I traced the stiching line onto my interfacing before ironing it on and used that for a guide which worked much better. Oh and the buttonhole, but me and my machine aren’t seeing eye to eye with buttonholes at the moment, on a different machine that would be fine (and you can leave the tab off).

Overall: I got two very professional looking bags that don’t particularly look home made, especially the boiled wool one. What I didn’t get to do is add a pocket (I’m a bit of pocket addict), the pattern doesn’t have one and I couldn’t think where to put one what with all those pleats.  This pattern is great for using up leftover fabric and there’s lots of scope for playing with contrast fabric and decoration (piping along the yoke seam? or maybe ric rac bumps sticking out?).

Make again? Maybe, as I said, I don’t really do handbags, but if I wanted to give one as another gift this is a quick make.


Is it Sunday yet?

Yesterday was Finish Something Saturday over at the Stashbusting sewalong. I had plans. I had great plans. I did finish something, but something I started on Friday night and none of the planned sad projects that have been languishing a while.

IMG_3971

  I’m dancing around manically because        IT WAS COLD and LSH was taking too long with the camera!

Today, however, I finally finished my purple jeans.  And the happy dance is partly due to the jeans, and partly due to the camper van in the background, which we just bought.

IMG_3970.JPG

The reason that these jeans were languishing is because when they were nearly done, I discovered that there was a frankly obscene fold of fabric at the front. Which is odd because this is the same pattern I used for my foxy jeans, which have no such problem. Anyway, eventually, after sulking at them for a while, I unstitched the crotch seams and got my husband to pin them to try and get a better fit. Then I tacked and expectantly tried them on again. It was worse. Argghh. I ripped out the tacking and redid it a random way. Bit better. Then I got invited round to my friends to do some sewing with her. Aha. Along came the jeans. She thought I was going to help her, little did she know, instead she ended up repinning my crotch for me. Lucky me because the third time, if not exactly the charm, was at least wearable.

Hmm, this me removing a wedge that I’m pretty sure is almost exactly the same as the one I ended up putting in for the foxy pair to help with the fitting issues on my first pair. This fitting malarky makes no sense I tell you. We did end up taking more off the front than the back to help pull the creases out, that’s why my seam allowances don’t match up.

IMG_3994

Anyway, all done now, phew and I’ve been wearing them today.

Out on a walk, admiring the details (like lining the pockets with the remains of LSH’s old pj’s).

IMG_3972

Actually I’ve told a bit of a lie. Whilst they’ve been languishing I, err, misplaced the proper jeans button that I bought. So, as it’s Sunday I just wore them out with a belt, especially as my machine was eating buttonholes yesterday. But I will find the button or buy a new one and attach it and make a buttonhole soon. Promise. In the meantime, here’s more van!

Have you finished anything this weekend?

That’s my boy

IMG_3954

Engrossed in a comic explaining gravitational waves, after hearing about them on the radio this morning while he was washing up the breakfast things.

Hat update, the hat has found an owner, turns up it wasn’t quite as small as I thought (just smaller than I intended). The only disappointed was when I had to tell him there wasn’t enough of the fabric left over to make a matching bigger one for his dad.

IMG_3957.JPG

The same hat owner also finished off the rat today that he started earlier this week (he came home from school one day really keen to make a rat, no idea why, his sister thinks it might be something to do with Chinease New Year). We used this page for the pattern pieces by the way, but followed my nose for construction, sewing it on the machine with the seam allowances on the inside.

IMG_3959.JPG

Next up, “can I make a dog?” (his Chinease zodiac year). 5 minutes before bedtime of course. Of course, I said, just not now, why don’t you draw a picture of what you want the dog to look like and we can work out how to make it in the morning. So he drew a plan. Including 2 pieces to be the side of the dogs face and a strip to go around in between them giving them depth. “Of course we’ll have to get the sizes right”. I was however told that it would be ok if I found something useful on the internet.

Good job it’s the start of the half term holidays then!  Do you have any plans for this week?


Scraps to Bags

Last week we looked at clothes making from scrap fabric, this week it’s the turn of bags, purses, totes, pouches and all things you can stuff things into!

(I have to be completely upfront here: Rosemary has done all the heavy lifting on this post. My bag-making resume is sadder than sparse…it’s practically barren.)

I love making bags, lots of straight lines and no fitting! I mean, the pieces have to fit together, but if it comes out an inch longer than you intended, it’s no big deal. There are no scary FBA’s to do or anything.  And here in the UK, with the recently introduced tax on plastic bags, handmade ones are bang on trend (err, did I really just type that?). Someone’s been spending too much time with the kiddos–busting out slang now…

There are a couple of approaches you can take to bag making. One is to start with with the fabric you have and go from there. “If I fold this piece in half, it’s about the right size to put X in”, or “I need something co-ordinating for the back”. Or, “this pieces is wide enough but too short, what could I piece it with?”. “Oh look, a jeans pocket, I could sew that on here.” And more power to you creative as-it-come types, but this approach terrifies me!

If this approach seams a little scary for you, (hand raised here…anyone else?), then the morsbag tutorial is a great place to start and they have loads of inspiring images and good motivation for getting going. (That website is fascinating, there are groups all over the world making and giving away these bags!) Once you’ve mastered the basics, you can start playing around with sizes,  adding depth to your bag with mitred corners, playing with pockets, decorating with trims, applique, fabric paint, screenprinting, the sky’s the limit. It really does seem like a basic bag is the best blank slate for using up all kinds of tiny bits as embellishments…

selvage tote | Flickr - Photo Sharing!

For instance, check out this bag entirely made from selvages, how cool is that (Sorry, I don’t know whose pic this is to credit them or link up). WOW, that bag is cool!

The other approach is to use a pattern. (Now you are talking my language!) There are loads of patterns out there, just search.  Here are some of our (lets face it) my favourites.

At the end of last year Sue over at Fadanista released a free Japanese knot bag pattern and over at the sew-a-long group we had great fun knocking these out, they’re a quick sophisticated make and ripe for embelishment and using up left over bits of precious fabric. (I’m embarrassed to say I still haven’t made one. But Rosemary has made them to use as gift bags. It’s a great colorblocking pattern.)

Feature collage

 Melissa shared this wristlet pattern and tutorialwhich has a cool twisted tuck detail and is perfect for using up scraps.


Another favourite pattern of mine is Seamstress Erin’s Presido Purse pattern, which is just so large and useful – I call it my Mary Poppins bag. I have made this an embarassing number of times (2ce to keep, the rest as presents) and I’m quite the fan girl! It introduced curves to my bag sewing, upped my zipper game and has great tutorials. And all of the bags above are made from remnants, left over fabric, and in one case a cut up pair of trousers! It works well with thicker fabrics on the outer, such as home decorating fabric.

If you only have smaller pieces, check out this scrappy quilt panel tutorial I used this technique to make the tablet cover above and just used fleece scraps instead of batting as I don’t quilt. It worked fine.

Looking for something a little smaller? I upcycled a pair of old trousers into a zippered pouch incorporating the back pocket.  Here’s a tutorial for some even more  gorgeous zippered pouches from scraps to get you started.

I have leftovers of boning, ribbon, velcro and some tent-red rubber-backed raincoating. Plus, I have lots of car trash. I need to make this car trash bag. http://www.makeit-loveit.com/2009/04/trash-bag.html

Drawstring bags make great presents for kids about to start school (or much bigger nieces who can’t find something large enough for their trainers!).

DSCF4836

And, in a fit of madness, I sat up until midnight making personalised bags out of scraps as a more eco friendly alternative to the all pervasive party bag.

Oh, and on the not actually bags  but still containers front, how about a purse/wallet?

IMG_1219

Or storage baskets? (You could even use them to keep the rest of your scraps in).

But like I said before, that’s just the tip of the iceberg when it comes to bag/tote/purse patterns, I’m sure you can find your own favourite and get busting.

We’ll be back next week with the last of our set of ideas, if you have any scraps left by then!

In the mean time, happy sewing!

Small but perfectly formed

I thought I’d just sneak in a quick clothing from scraps make before the week is up.

IMG_3946

It’s the flat cap from Urbandon’s pattern and tutorial that I told you about last week. It’s a fairly quick make and I would say it was simple: apart from the sewing together of fabric that curves in different directions from each other, which is a fairly big caveat!

IMG_3947

I’m pretty sure I originally bought this (suspected) wool (I haven’t tested it) as a remnant decades ago. I know that I once made my brother a bag out of it with a bicycle embroidered on. The lining are from the remains of a defunct pair of linen trousers that were LSH’s. There is proper petersham in it too that I bought in a job lot of ribbon someone else was destashing. So all in all this really is scrapbusting.

IMG_3949

Which is for the best really, as it’s come out way too small. Too small for LSH and I will find out in the morning if it’s too small for The Boy too (mind you, we are a family of Big Heads). Never mind, I shall find something to do with it and it was fun seeing how it all came together, although I’m not totally convinced I understood what I was doing with the band (you start by cutting a rectangle 3.5x 56 cm and next thing you know one of the long sides is being referred to as longer than the other?).  Maybe I’ll try again with some more scraps.  In the mean time, I will unpick the embroidered secret message (well, I was going to give it to him on Sunday).

A circus of Puffins

*Actually, the time before I made this t shirt was my first ever Full Bust Adjustment and I messed it up and fudged it. I wasn’t quite sure how to manage one on a kimono sleeve t shirt but according to a comment on Maria’s blog“you just cut off the sleeves, and then put them back on after the adjustment”. Righto. I think I did this right.

Next up, the back. I decided that as I’d gone to all that fuss with the front, maybe I should finally learn how to do a sway back adjustment on the front, using this tutorial from Kitschycoo, in for a penny, in for a pound, right?


So, more taping (does anyone actually tape the whole pdf together before starting to cut pattern pieces out?), chose where to do it (err, no lengthen/shorten line as per tutorial, so I chose a handily looking placed join in the taped together pieces), mark wedge to be taken out (in blue) scratch head, re-read tutorial, mark wedge the correct way around (in pink, I’m loosing 2cm height from the centre back here), trace top half of pattern (with seam allowance included trick), mark top part of wedge, rotate greaseproof tracing paper so that line is now at the bottom of wedge, trace bottom part of pattern. See, that wasn’t so bad was it?  And now there are two personalised pattern pieces and walking the side seams looks like the side seams are still about the same length. Brill.

A short panic about cutting into my precious fabric later (really I should use a fabric I don’t care about to test my fit, but all my jersey is precious), 4 seams (with clear elastic in the shoulder seams) later and I’m ready to try it on.

Not too shabby, the swayback has definitely helped reduce pooling in my lower back, it’s a little tight around my ever expanding waistline (no, no happy news here, just pies) and it’s far too long, as despite making this mistake last time, I cut the 4XL length with the L size.

IMG_3932

Just some finishing to do. Inspired by Dandelion Drift recent shoreline boatneck  post I use this variant of this technique to finish my sleeves and neckline in orange ribbing. Happy colours! (I cut the neckline ribbing at about 90% the length of my neckline).  This was a bit of a spur of the moment decision, I love the orange but had to trim my seam allowance to get the binding to work as instructed. The inside looks a bit messy but worst of all the sleeve hem is still flipping up in the pictures above. Arghh. Bane of my sewing with knits life.

IMG_3930

Then I hacked off some inches from the bottom and added a wider orange rib band (so the length ended up back to about where it was drafted, nice and long without being silly).

And the jobs a good un. And now I can wear puffins all day long! My daughter’s comment on it was “these two are talking to each other and this one is ignoring that one”…

Scrapbusting part II: Clothes

Stashbusting Sewalong Challenge Button 2016 (1)

So, now you have all gone through your scrap tubs (you did do your homework didn’t you?), what are you going to do with it the bits that made the cut?  Maybe you’re already feeling inspired, in which case jump right in and get busting. If not, we have a few idea’s for you, starting today with clothing.

tops

Depending on the size and shape of your scrap, you might be able to squeeze a whole item out of it for yourself. I have 2 pieces of about ⅔ yards each left over from big flowy tank tops I made last spring. They’ve been earmarked since then for some new sleeveless tops this spring…in fact, they are both navy fabric and I will have navy thread in my serger for the jeans I’m sewing…I should just whip them together really quick. I made 3 last year and they are easy to wear and take up less than a yard of fabric.

If you are looking for a quick pattern that doesn’t use much fabric, Maria Denmark’s free Kirsten Kimono top is super simple, especially if you don’t choose a striped fabric. Why not pair it with her twisted skirt tutorial for another quick make with a smallish amount of fabric.

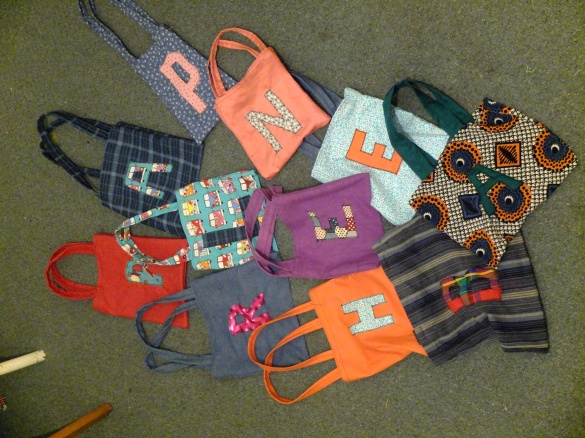
Maybe you have a small person (aka a child) in your household. If so you probably already know that they can be a great way to use up remnants from your own sewing due to their diminutive nature. See, err, about half of my blog  for details (including the 5 projects above all made from leftovers). Also check out So Zo’s post on all the cute shorts she’s made as presents . However, if you don’t have small people in your life to dress in your off cuts, or if they downright refuse, fear not, there are other things you can make.

If you, like me, have bit of an addiction to expensive scandinavian jersey, then I’m sure that due to its extreme loveliness and cost, you also don’t want to waste any of. I like to make my leftovers into rather glorious knickers. So Zo (there’s that name again) has a great free pattern to start you off . If you don’t have appropriate elastic to hand or can’t get hold of any (which can be tricky), try Kitschy Coo’s Barrie brief pattern, which uses fabric bands instead . Of course, you can make knickers with woven fabric too, liberty ones are said to be very luxurious…

There’s also a whole post on scraptastic underwear over at Seamwork, including bra’s (eek, scary).

 Don’t forget that men need underwear too, check out the Comox Trunks pattern from Thread Theory. I’m not joking, you need to see this pattern page even if you have no intention of making the pattern (purely for research). WHOA, NELLY! Why can’t all our  links have pictures like that? ***note to self, new blog idea…***

Surely everybody knows about the Oliver and S free sunhat pattern by now?  I have lost count how many times I’ve made this (including enlarging it for my huge head). I even did a hack to make a witches hat at halloween. (I know the truth. Rosemary wears that witches hat more frequently than at Halloween)

Sunhat not your thing?  How about a flatcap then? Such as this free pattern which I have my eye on for Long Suffering Husband.
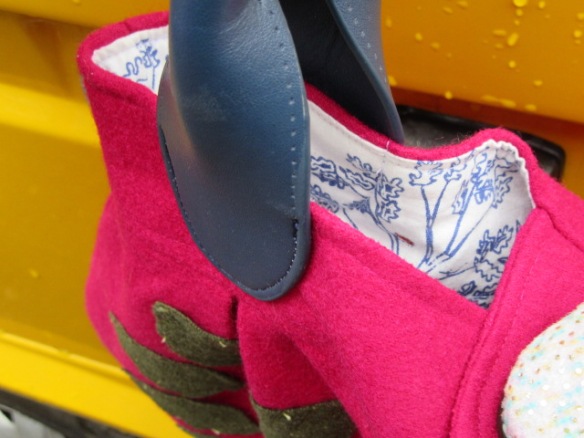
In our house we seem to need a lot of circular scarves, the kind that can be worn under a bike helmet. The branded ones cost a lot and they’re so easy to make, rectangle, hem, done (knit don’t fray). When I was doing my scrap sorting homework my LSH chose 3 bits straight from the tub to make some for him. Or make a longer looser version in woven fabric. If you want to line them and you can’t get your head around the geometry, just search for infinity scarf tutorial – there are tons out there.

What about about socks?  Never thought of making them?  Well, to be honest, neither had I until I read this great post.

I won the Sew Stylish Slippers pattern from Filles A Maman in December. It uses my left over knits, so I’ll be sewing a pair of those up this month too. Bonus: they will match the cardi I sewed in the knit fabric a couple years ago! (You’re such a trend setter Crystal.)

 Maybe you prefer cute little ballerina style slippers. I used some leftover flannel, ribbon and satin blanket binding to make these free ones.  Naturally, I had to stray from the written instructions and opted to sew mine using the instructions on this blog instead.

Don’t restrict yourself to patterns that come designed for more than one fabric, you can change things up to introduce colour blocking into old favourite patterns too, check out this t shirt  for inspiration.  Or how about Grainline’s post on colour blocking their Archer pattern. And if you don’t fancy changing an existing pattern, how about one designed to use lots of different fabrics such as Fehr Trade’s Tessellate Tee.

shrug

Here, I’m using leftover knit as the front panel on the Give Me A Shrug top from So Sew Easy. I’m just filling in the rest of the shirt with a basic black “staple” fabric. Uses up a scrap and highlights the little bit of print I have. (Please note that the shirt is not actually sewn in said photo…just cut out for now).

dolmon.jpg

I didn’t have enough striped fabric for a whole top in this second picture, (probably a good thing looking back…that’s an overwhelming stripe…)(I don’t know, I like it) so I just used it in front and filled in the rest with a basic black knit. This is Cation Designs free Doloman Sleeve Top.

IMG_1132

woo hoo

I got given a fat quarter of cool fabric by a non-sewing friend for a birthday present and was told to make something for myself. So I used it to make feature pockets and belt loops on a skirt, it really cheered up this boring cord that was sitting in my stash leaving me feeling uninspired.

... Patchwork and Scrap Fabric Skirts - Hideous! Dreadful! Stinky!Hideous

While searching the internet I also found this photo of a patchwork skirt which comes from http://hideousdreadfulstinky.com, but I can’t find the relevant blog post to go with it, sorry. However, how cool is this? It’s very cool, actually… [haven’t you heard of rhetorical questions in America?]. Or use several scraps, like this waistcoat/vest/gillet.

Or what about Reverse Applique, also known as Alabama Chanin, there are loads of examples out there such as this one.  You could either use this technique on a new garment, or set to with your scraps and your mending pile and give something old and loved a new lease of life. I know we’ve had some Stashbusting Group members use this technique before it it was lovely! You could do some interesting jeans repairs with this technique as well.

stitched scarf inspiration. Great idea to use scraps of silk.:

Talking of mending, the Japanese Boro technique of using Sashiko stitches for visible mending is all the rage on the Make Do and Mend Group. And this can be made to make larger things, such as this gorgeous scarf. Maybe we can just take our scraps and MAKE a scarf like that with all the top stitching. I want one!

 Still stuck for ideas?  Great minds think alike, while we were planning this series So Zo published some similar ideas for organising and making.

Anyway, that should be more than enough ideas to get you started. (Bonus points to Sue who has already started.) We’ll be back next week with some more  ideas.  In the mean time, we’re looking forward to seeing lots of your scrappy makes on the Stashbusting group (or post a link in the comments below).

Jasper

Finally, a jumper, for me, nearly made in the last weekend of Jan (hey I was ill) thereby meeting a key sewing goal.

DSCF0231

I know, I know, it’s a bit wierd to start with a back shot and it’s not because there’s an exciting reveal at the front, just I could only get LSH to take 4 photo’s in total and it took some effort getting that many out of him. The back shot is the only one where I don’t look like a complete [insert mild insult of your choice here].

This Paprika Patterns Jasper sweater took sooo long to make. Not actually make you know, that was surprisingly quick, especially one the welt pockets were out of the way. No, it took so long to get  around to making it, as I’d built it up into some impossibly complicated thing in my head, partly due to the fact that there’s a flow chart to help you choose your size. (And also because the test garments on the Paprika website are so swoonworthy I was worried I wouldn’t do the pattern justice.) In the end, I was in such a strop with the Collar Of Despair on the Jumper That Shall Not be Named that I bit the bullet and, with a lot of repeatly muttering “this is a Muslin, a test garment, it doesn’t matter” to myself, I manged to get on with it.

DSCF0230

[Seriously , this is the best shot by far. I may have to find a new photographer.]

As a fit test muslin goes, my thoughts are more space could be used at the bust, which might stop the front hem rising up a little too, the pocket is adding extra layers where there is too much of me to start with (and I forget it’s there when I’m wearing it so don’t use it), I’d like it longer (this is the sweater length, not the dress, but I like my jumpers on the long side), the arms are ok now but were tight (I redid them with a smaller seam allowance), oh and the arms seem shorter now I’ve added the cuffs, which is weird (yes, I did lazilly wear it before adding cuffs).

I decided while I was making it that I hated this fleece that I can’t remember buying (but I know it was always earmarked to test this pattern) and couldn’t understand why I chose this colour. I like it better now it’s finished, the colour is not one I normally wear but looks ok on, but the fabric quality isn’t great – I’m not sure how well it’ll wash and wear. I’m also worried that it’s not a good test for my final fabric, being both thicker and less stretchy.

The mental block on this project was definitely getting the size right and working out what adjustments to make. I’ll give you the details of my agonising, in case it helps anyone else.  In the end I took a deep breath, did some careful measuring and reread the instructions on choosing sizes and whether you need and FBA or not:

First up my measurements:

  • Full bust 106cm – size 7
  • Waist 96cm – between sizes 8 and a 9
  • Hips 120cm – between sizes 8 and a 9

So according to the flowchart I needed to print pattern file 6 -10 (based on my hip measurements). Which is good, as that was what I had printed out. Phew. (From a copy shop, this pattern has both metric and imperial copy shop options so I could get it printed easily, hooray! So no taping, double hooray)

Next up, the Full Bust Adjustment (FBA) decision. My Upper Bust measures 100cm which is 6cm difference from full bust and therefore falls in the 4.5-8cm difference C cup range that the size  6 – 10 is drafted for, so officially I was good to go without any adjustments. I find this weird as I wear an F/G cup bra, but I decided to trust the pattern and reminded myself this was a muslin, so it’s ok to go wrong. In the end I traced pattern size 7 for my shoulders and bust grading to 9 at waist and hips and marking my notches as best I could and trying to make sure that the blend started/finished in the same place on the front/side and back pieces. I think the shoulders fit ok, but a FBA would actually have been a good idea. Then again, the arms were tight so maybe I should do a size 8 top half grading to a 9 for the waist and hips? Or do I need a size 8 with and FBA grading to a 9? And there’s quite a lot of fabric around my centre back so do I need a different size at the back to the front, which is surely madness, or a sway back adjustment? Arrgh, fitting is hard!

As the markings for the welt pockets are different for each size, I lined my welts up with my lower dot on my pattern front (where my pattern was definitely size 9) and then just made sure they were parallel with the edge of the pattern piece (as I hadn’t been sure where to put the top dot as at that point my line was in the middle of blending from the size 9 to the 7).  I cut the pocket pieces a straight size 9, centred them on the front piece and trimmed the excess off to make them match.

After the welt pockets it was pretty easy actually. Just kind of sew it together. And there’s a great tutorial for the welt pockets. The only I did get a bit confused was whether I was supposed to sew the bottom band through the pocket as well as the front or not, in the end I decided not. The only thing I would change  construction wise is when trimming the seam allowance at the neckline, I would grade it so the longest piece is on top and then when I topstitch it would hold everything down together.

So, in conclusion, I need to be less scared of getting started and less precious about my muslins. This jumper is fine, I would find it perfectly acceptable size wise if I bought it in a shop. The pattern is great, seems well drafted and had lovely clear instructions. I definitely do want to make it again in my earmarked precious fabric, with a hood next time and in the dress length (if I have enough fabric). I will almost certainly leave the welt pockets off, seeing as I find them unflattering and not useful, however this is my personal preference, because on the test garments they look great. I’m still dithering about what size to use especially as the next fabric will be both thinner and stretchier.